ECE4960-2022
Course on "Fast Robots", offered Spring 2022 in the ECE dept at Cornell University
This project is maintained by CEI-lab
Cornell University: ECE 4960/5960
Lab 4: Characterize your car
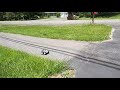 .
<Note that the video above was shot with the 2020 car. However, the general abilities remain the same.>
.
<Note that the video above was shot with the 2020 car. However, the general abilities remain the same.>
Objective:
Before we start taking the car apart, we can leverage the remote control to familiarize ourselves with the capabilities of the hardware. In later labs we will seek to replicate manual behavior with autonomous control and in some cases exceed what manual control can make it do for planar navigation and more dynamic (‘flippy’) behaviors. This is a fairly open ended lab, but the goal is to methodically document your car in any way you think might be useful later on. We will brainstorm things that may be important in class, and there is an additional list of suggestions below.
Prioritize - you only need to do a couple of these! You will be graded for your reasoning of why you measure particular aspects, and how well you document it. Note that we expect you to pick from both category A (simple measurements) and B (require experimental setups). Many of these experiments may require replicas, so we encourage you to coordinate in teams on what and how you want to measure system properties. Think of it this way: whatever you write down, you should -yourself- be able to use in later labs.
ECE5960 students are expected to do at least 2 measurements from category B.
Prelab
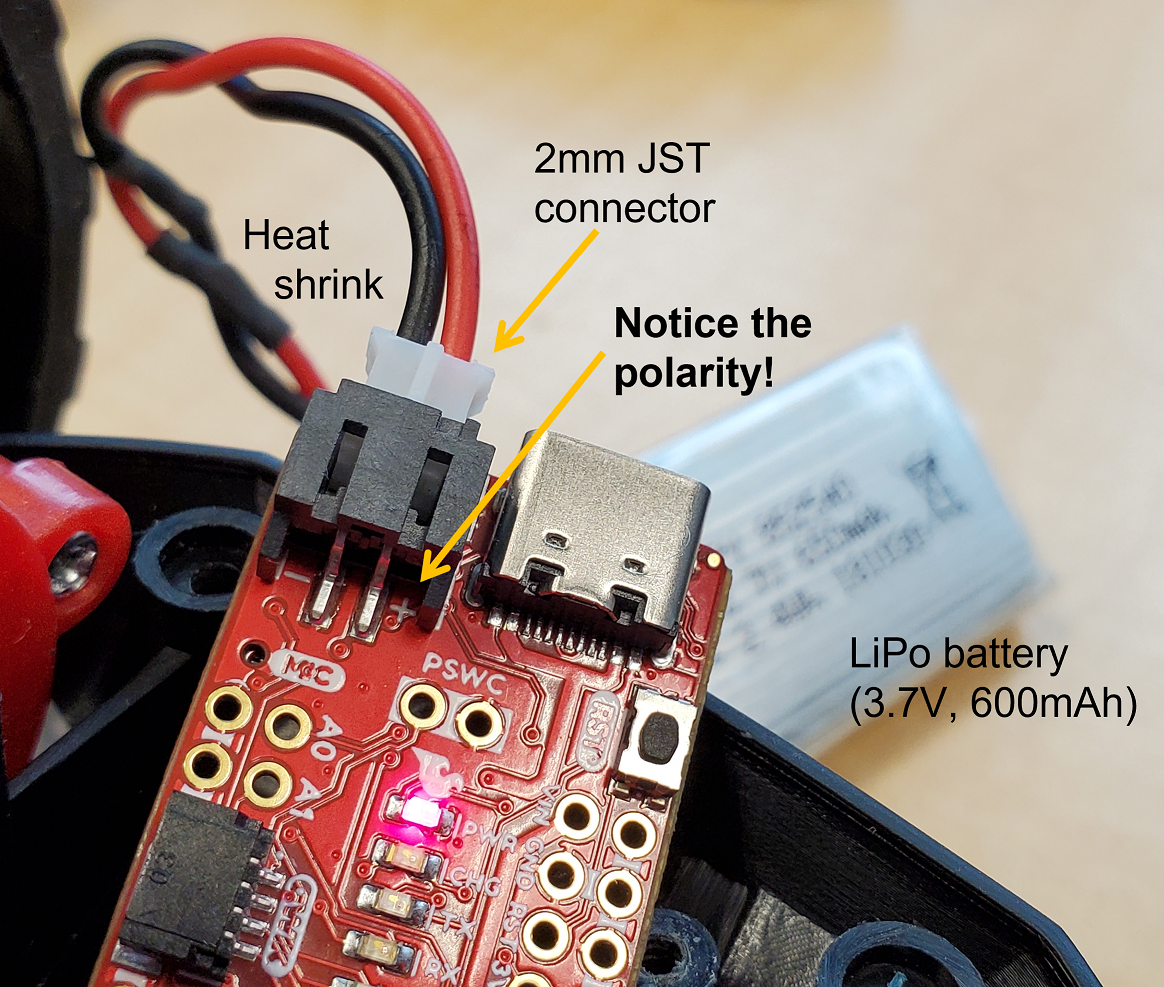
We highly encourage you to make extensive use of the Artemis+sensor setup you completed in Lab 3, rather than rely on cumbersome external measurements. To do this, you will need to make sure that your Artemis works while being powered by a battery (instead of your computer). The highest power consumption stems from the motors, therefore, we will use the 850mAh battery packs for the motor driver when possible, and one of the 600mAh battery, which originally came with the car, to power the Artemis.
To do this, replace the black male connector from the battery with the white 2mm JST connector. Be very careful not to short the Li-Po battery as this can cause fire and (small) explosion hazards. To avoid this, the safest option is to cut and connect one lead at a time, and cover each solder joint in heat shrink. Do NOT cut both leads simultaneously, as your cutter will short the leads!
Finally, please triple check that you polarize the connector correctly according to the input on the artemis, before hooking it up. Feel free to ask a TA before attaching your battery, if you feel unsure whether you did it correctly.
Now, if you plug in your battery while the Artemis is connected via USB to your computer, the yellow LED should light up, indicating that the battery is being charged from your USB port. If you unplug the Artemis from the computer, you will have to press the reset button to make your program run again while powered by the battery.
Examples of non-destructive testing (don’t destroy your car!)
Don’t forget, the battery only lasts 10min on a full charge, so plan out 1-2 tests per day.
- (A) What are the dimensions of the car?
- (A) What is the weight?
- (A) How long does it take to charge?
- (A) What is the battery life time?
- (B) What is the range of speed? (remember, this is battery dependent). Consider using the TOF sensors to help you measure this.
- (B) What is the range of acceleration? Consider using the TOF sensors and/or the IMU to help you measure this.
- (B) What is the braking distance? Consider using the TOF sensors and/or the IMU to help you measure this.
- (B) What surfaces can it handle? Can you register the difference between surfaces using the sensors?
- (B) What stunts can it do? Be sure to note the sequence of commands that corresponds with each stunt.
- (B) How reliably does the robot turn around its own axis?
- (B) How well can you operate the car with manual control?
- Ex. starting from ~5m distance, at full speed, how close can you get to a wall and stop the car, without a crash?
- Ex. how accurately can you hit four corners of a meter-scale square as fast as possible?
- Ex. can you reliably reproduce tricks? (describe which and what control inputs you give it)
- Ex. can you make the robot balance on one set of wheels (front or back)?
- Feel free to come up with other ideas!
Write-up
To demonstrate that you’ve successfully completed this lab, please upload a brief lab report (<600 words) with description, data, photos, and/or videos. Do not forget to mention your collaborators. We will also ask you to give a brief 3-5min presentation in class, based on your Github page, together with your collaborators.